Fun Exercises To Practice Musical Intervals
I have great news for you!!
You will be able to memorize ALL 12 intervals in a reasonable short amount of time, AND have tons of fun in the process.
The exercises described in this blog will help you with that.
- Solo over C major songs linearly.
Pick a string set and solo with intervals over songs or backing tracks in the key of C (for now).
This is like single-string playing.
After all: the idea is that you only pay attention to the notes on the lowest of the 2 strings you play on, and apply the right interval fingering on top of that note.
The fingering is dependent upon:- Which interval you’re practicing at that time.
- Which note you are on in the scale.
- The string set you’re playing on. (Fingerings look different on the G and B strings)
For example: if you’re soloing with 3rd intervals, on the top 2 strings (B & E), you will be playing a major 3rd fingering on top of the notes C, F, and G on the B string, and a minor 3rd fingering on the other 4 notes.
(If this doesn’t make sense: review this blog on 3rd intervals The Study of Musical Intervals Part 3: The 3rd Interval)
This interval exercise has been discussed in past blogs on intervals.
Here’s the previously posted video explaining this:
The Study of Musical Intervals Part 2: The 2nd IntervalHow To Organize The Practice Sessions
- • Practice in the key of C only to give yourself time to get used to the interval.
• Spend 3 minutes soloing with 2nds.
• Do 3rds next, then 4ths, 5ths, then 6ths, and finally 7ths.
• 3 minutes per interval, adding up to an 18-minute daily drill.
• Every day.You could also organize your interval practice like this:
- • Practice in the key of C only to give yourself time to get used to the interval.
• 1 interval a day. (Different interval each day)
• 3 minutes per string set;
• 5 sets of 2 strings X 3 minutes = 15-minute drill.
• Every day.Narrow the drills down to 2 minutes per interval or string set when it gets easier.
Since the drill now only takes 12 minutes, maybe you can do 2 sessions a day: practicing a different string set or interval in each session.Take It To The Next Level.
Start practicing different keys (moving up the circle of 5ths) once intervals in the key of C become lesser of a challenge.
Here’s a list of songs in all 12 keys that you can use as your backing track.
Songs in Different Keys to Use As Your Backing Band - Add open strings
This creates cool, lush voicings.
All open strings on the guitar are tuned to notes of the C major scale.
As a result, you can practice intervals on 2 adjacent strings and add open strings to whatever string set you are practicing intervals on, to come up with ethereal sounding lush chords.This works on any string set and you can incorporate any of the open strings to the intervals you’re practicing.
In addition: you can do this in any key that has that open string as a scale note.For example with 3rds in the key of C on strings 2 and 3:
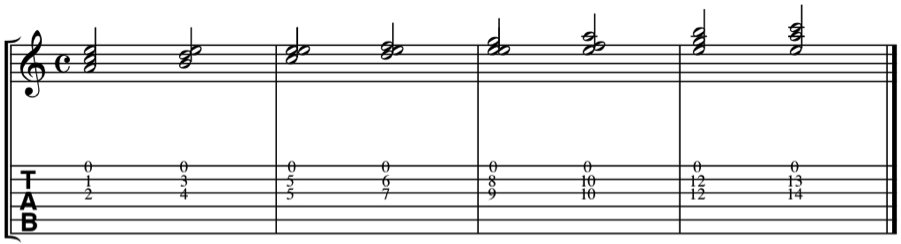
Or on the D and G string:
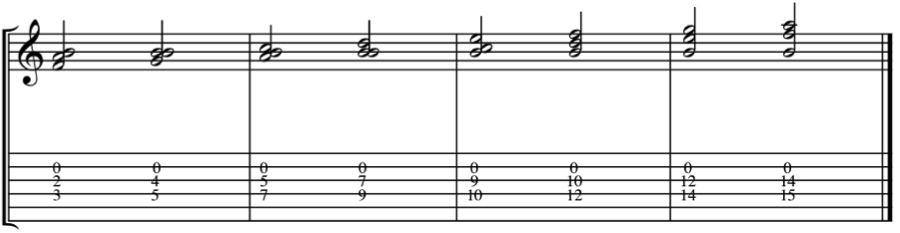
Or playing 3rd intervals on the A and D string with an open G-string.
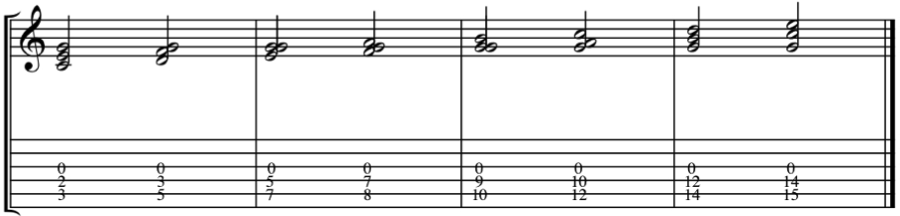
You could also of course hit 4 strings: intervals on 2 strings in combination with 2 open strings to create richer sounding lush chord voicings.

Or playing 3rd intervals on the 2 lowest strings with an open D string.
All of the above practice examples incorporated the 3rd interval with an open string added on top of the interval.
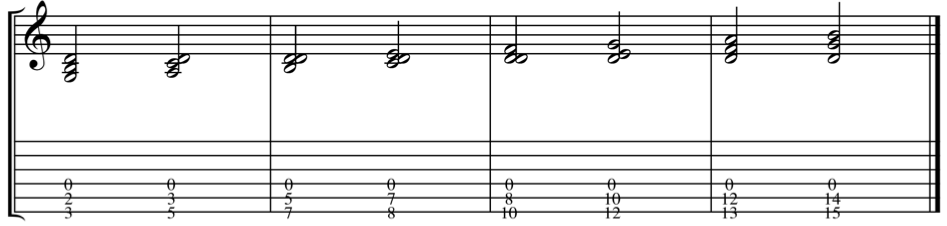
You could also add an open string underneath the 3rd intervals, as in the following example.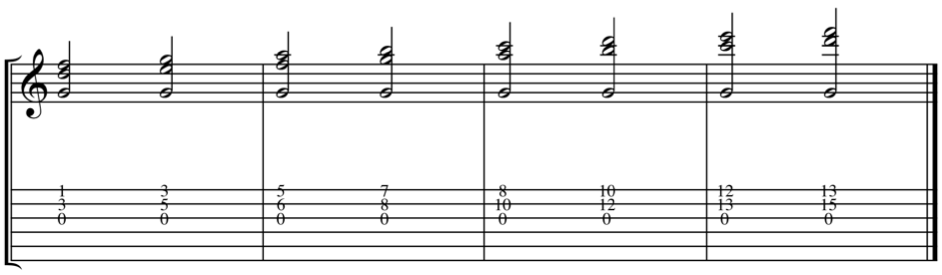
Here’s another example of this with 3rd intervals played on the G and B string while
adding an open lower D string drone.
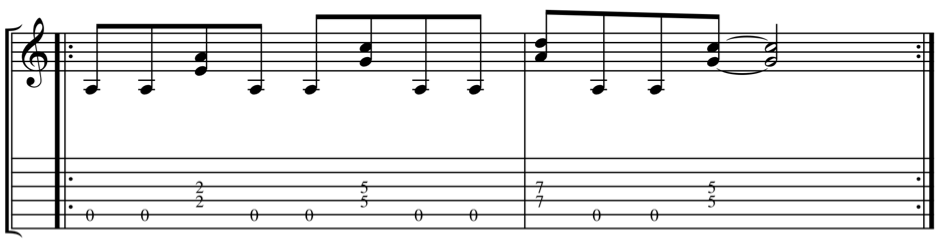
Of course: all of the above exercises could be done at any interval. Have fun experimenting with 4th, and 5ths and so on.
Also experiment arpeggiating the notes: hitting one note at a time (broken chords).
Open string voicings like the ones above, tend to sound very rich and intricate. That richness and complexity of sound sometimes tend to get lost a bit when you strum those voicings. - The Hard-rock Pedal Point Rhythm Approach:
Hit a rhythmically consistent 8th note rhythm (2 notes per beat) on an open bass string, and in between, randomly hit intervals, which you move through the scale on the neighboring string set of 2 strings.
This is THE ultimate 80’s hard-rock rhythm style.
This technique is ALL OVER the place in the music of Iron Maiden, Ozzy Osbourne, Randy Rhoads, Motorhead, or Van Halen, just to name a few.This is usually done on the A string or low E string, but you can use this approach on every string set.
Following example: 3rd intervals on D and G-strings move against a pedal point A bass.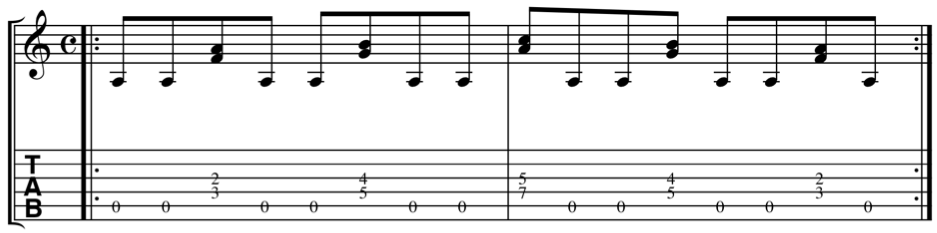
Following example: 3rd intervals on G and B strings moving against a pedal point D bass.
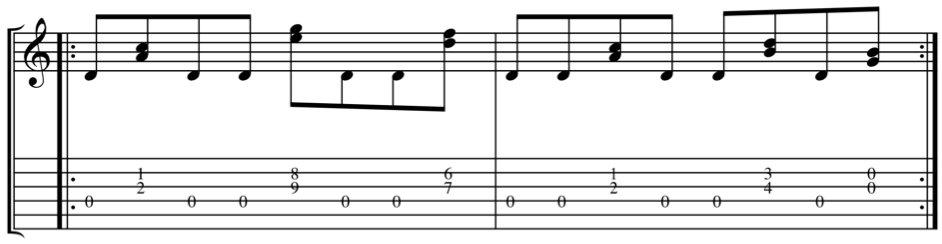
In hard rock and metal music, 4ths and 5th are more commonly used than 3rds in the rhythm parts. Following example: 4th intervals moving against a pedal point A bass.
- Intervallic Soloing Technique:
Improvise playing the notes in your fingerings melodically, instead of harmonically.
You basically need to separate the 2 notes in the interval.
You do so by lifting up your finger after picking the note, so the 2 notes of the interval don’t sustain into each other.By doing so you make it sound like 2 single notes, as opposed to making it sound like harmony.
You can come up with really great, interesting melodic lines with this improvisation technique.
You’re being more creative with the notes in a scale if you’re playing intervallic games with them.Experiment with hitting open strings (of the string set you’re playing intervals on) in between your interval notes.
This makes for some incredible, intervallic leaping lines.
This whole exercise is also an amazing picking technique challenge.Since this is an improvisation exercise, practice it over songs or backing tracks.
It is much more fun that way. - Playing intervals over a blues in A minor.
C major and A minor are relative scales: they contain the same 7 notes.
The great thing about the guitar is that you have an Am blues chord progression on the open bass strings: A – D – E – A.
You could accompany yourself hitting open bass strings, which you keep ringing out while playing harmonized melodies on the higher strings.- The 12 bar blues in Am starts with 4 bars of Am.
Pick the open A string and let it ring. Play harmonized melody lines in intervals against that open A bass on strings 3 and 4. - Then for the next 2 bars (bars 5 and 6), you go to Dm.
Pick the open D string, let it ring out, and play melody lines with intervals on strings 2 and 3. - It goes back to Am for the next 2 bars.
Do the same as you did in the first 4 bars. Make up harmonized melodic phrases against that open A bass on strings 3 and 4 again. - Then 1 bar Em: hit open E string, let ring. Meanwhile: make up harmonized melodic phrases on strings 4 and 5.
- Then 1 bar Dm: hit open D string, let ring, and play intervals on strings 2 and 3. Then 1 bar Am: hit open A string and play intervals on strings 3 and 4.
Then finally last (12th) bar, 1 bar Em: hit open E string and play harmonized melody lines on strings 4 and 5 again.
So basically: you change the open bass string to fit the chord changes in the 12-bar Am blues.
When changing bass string, you also change the string set you are soloing on with intervals.You can combine all of the practicing techniques discussed earlier, and come up with some great, interesting blues solo guitar work in the key of Am.
- The 12 bar blues in Am starts with 4 bars of Am.
Interval Recognition.
It is of the utmost importance that you memorize the sound of all the intervals.
Ear training to a large extent really is auditory memory training.
As music is all about intervals, being able to identify any interval by ear effortlessly enables you to figure out melodies and chords to songs instantly.
This skill also helps you to improvise over complex chord progressions because your ear guides your fingers.
Playing great solos is very much a matter of “being able to play what you hear in your head”.
If you haven’t started practicing your ear yet, do so today!
Here’s a great collection of ear training drills.
Start with the first one in the below list.
Relative Pitch Ear Training
Ear Training: 3-Note Patterns
Ear Training: The Ultimate Collection of ET Exercises
Given the importance of ear training in your musical development, you want to make ear training exercises a part of your daily practice routine.
Conclusion.
This is where music theory becomes fun.
The chapter on intervals takes up a large part of the study of music theory.
Many people cringe when they even only hear the word “theory” or “exercise”.
However: when presented in such a way that the theory is learned through drills that sound great and are fun to play, you are much more open to the information.
People learn much more effortlessly when they are having fun.
You improve in many different areas from the above drills.
Not only are you getting better with intervals: you’re also improving your rhythm playing, your improv skills, your ear, your picking technique, and your stylistic versatility. Meanwhile: you’re discovering cool, new, lush chord sounds in the process.
Here’s a video showcasing the discussed material.
Hit me up anytime at [email protected] if you have any questions, or if you would like to book a lesson.
These free lessons are cool, but you will never experience the progress, joy, and results that my students experience in lessons when you’re learning by yourself from blogs and videos.
That is why people take lessons: way better results and progress, much more complete information, exposed to way more creative ideas than you can get from a blog or YouTube video.
There is only so much that self-study can accomplish.
If you want to see amazing results and progress in your guitar playing, buy your first lesson here and get started ASAP.
- 1 Lesson = 75

You’ll impress your friends and loved ones in no time with your guitar playing!
Consider donating any small amount to help me keep this blog going.
Thank you for your support!
 (29 votes, average: 4.97 out of 5)